


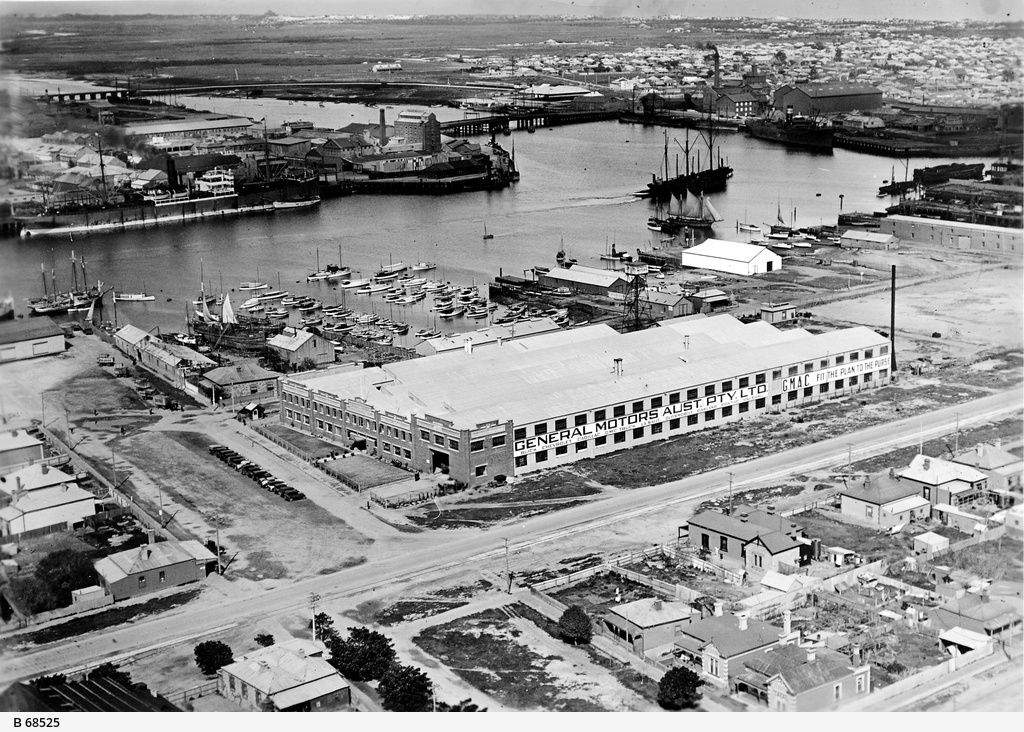
Opened in 1940, the Birkenhead Bridge connects Port Adelaide’s downtown with the suburb of Birkenhead. From 1840 until the span was constructed, transit across the Port River’s Gawler Reach was plied by oar-driven and motorised ferries. Birkenhead Bridge greatly facilitated access to Outer Harbour suburbs, as well as industrial complexes, depots and maritime infrastructure on the far side of the river. A decline in maritime activity within the Inner Port in recent years has significantly reduced the bridge’s use, but it nonetheless continues to service both road and shipping traffic. In early 2014, two of the span’s lanes were converted into enlarged pedestrian and bike paths as part of the South Australian government’s Outer Harbour Greenway initiative.
Origins
The need for a bridge that connected Port Adelaide with isolated settlements and boat landing sites on Lefevre Peninsula was a constant topic of discussion during South Australia’s earliest years. In the 1830s and 1840s it was common for arriving ships to discharge passengers and mail on Lefevre Peninsula’s western shoreline during periods of calm weather. The passengers would then undertake a 1.5-kilometre overland journey to the western bank of the Port River, where they employed watermen to ferry them across to Port Adelaide. In the meantime, the vessel from which they disembarked would enter the river and gradually make its way upstream to the Port. In many cases, passengers often arrived at their destination one or more days before their ship moored at one of the wharves along the waterfront. It was the needs of these individuals for a safe, convenient means of crossing the river that provided initial incentive for a bridge linking the Port and peninsula.
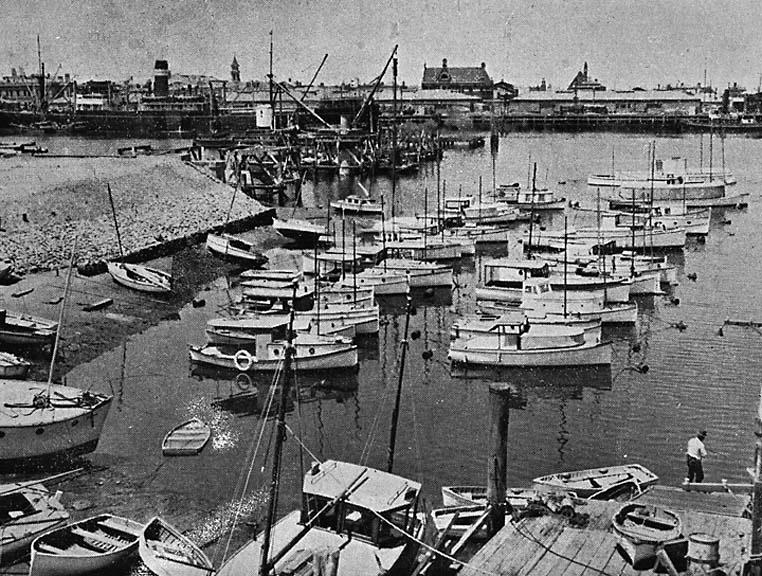
In 1859, a timber span dubbed the ‘Port Adelaide and Lefevre’s Peninsula Bridge’ (or, more commonly, the ‘Port Bridge’) connected the western end of the Port with Glanville. It featured a hand-powered central drawbridge mechanism that allowed small vessels access to the upper reaches of the Port River, but was plagued by poor design and a litany of maintenance issues. An iron swing bridge (the Jervois Bridge) replaced the Port Bridge in 1878, and while certainly an improvement on the previous span, it too suffered its share of problems. Meanwhile, the amount of motorised traffic transiting between Port Adelaide and Lefevre Peninsula steadily increased, mostly as a consequence of developments at Outer Harbour associated with industry and maritime infrastructure. By the second decade of the twentieth century, Jervois Bridge was experiencing progressively greater maintenance issues and was no longer capable of effectively handling the elevated traffic volume to which it was subjected. Left with no other viable option, the government soon conceded that a new bridge was necessary.
Early Plans
Design plans for Birkenhead Bridge were first submitted for consideration in 1924. Initially, the span was to feature a single ‘bascule’, or drawbridge leaf that was lifted via a ‘see-saw’ mechanism and tilted upwards to allow ships to pass through. This design was rejected on the basis that the bridge did not offer sufficient clearance at high tide for passing vessels to safely negotiate it. A revised version that extended between Commercial Road and Birkenhead and comprised a double-bascule configuration was approved in 1929. However, cost-sharing negotiations among the various national, state, municipal and business parties with an interest in the bridge’s construction failed to attain compromise, and the project was shelved. In April 1932 a group of private investors submitted a proposal to fund the bridge’s construction with a user toll, but the initiative collapsed after promised Federal funding failed to materialise.
A series of committees and inquiries followed that were charged with determining whether the need for a new bridge existed. An overwhelming majority of Port residents and industry groups responded in the affirmative, but were stymied by ongoing disagreements over where the bridge was to be sited. Most preferred a crossing between Commercial Road and Birkenhead because it provided a direct route to Port Road and would reduce congestion on St. Vincent Street. However, the South Australian Harbours Board (SAHB) wanted to retain the connection between Birkenhead and the Queen’s and North Parade Wharves provided by pre-existing ferry services, and advocated the bridge’s placement at Mundy Street. In 1935, Port Adelaide’s Public Works Committee ruled the new span would connect Commercial Road and Elder Street—a decision that was almost immediately rejected by SAHB. Following yet another committee and inquiry, Act 2315 was passed by the South Australian Parliament in 1936. It stipulated the new bridge be built at Nelson Street as a compromise between the Commercial Road and Mundy Street sites, and ruled out collection of a toll as a means of funding its construction.
A New Bridge for the Port
By 1937 all of the riverfront property within the bridge’s proposed footprint was purchased, and tenders advertised for its construction. Following a brief period of re-advertisement, the tendering process closed in January 1938 and Adelaide Constructions, Ltd. were contracted to erect the span. Work proceeded rapidly, and by November of the following year the northern pier was complete and ready for inspection by South Australia’s governor Sir Charles Malcolm Barclay-Harvey.
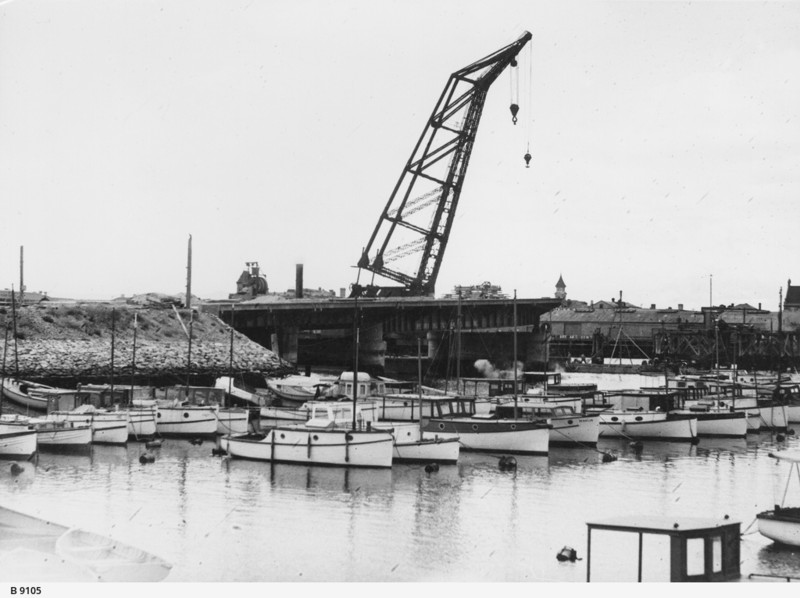
Innovative technologies were employed to build the bridge, particularly its underwater components. For example, ‘pneumatic caissons’ (a form of airlock utilising compressed air) allowed workers to access the interior of submerged concrete bridge supports for the purposes of excavating sediment from within them and filling these voids with additional concrete. This method was utilised as a means of ‘obviating the necessity of employing divers’, and appears to have been both safe and successful. The span’s concrete support structure rested atop 458 hardwood piles, each measuring 40 feet (12.2 metres) in length. These piles were driven into the riverbed until their tops were buried four feet (1.2 metres) below the mud level, after which the concrete supports were installed.
During a period of excessively high tides in August 1939, a rudimentary diving bell was developed by chief engineer P.J. McMahon in an effort to keep the project’s underwater work on schedule. Built of Oregon pine and lined with iron sheeting, the bell was touted as both the first to be used for bridge construction in Australia, and the first ever example manufactured from timber. It measured seven feet (2.1 metres) high, seven feet by four feet (2.1 by 1.2 metres) wide at its base, mounted five tons (5000 kilograms) of pig iron ballast, and could carry two individuals. ‘Novel’ fittings, including an electric light, speaking tube (the receiver of which was manufactured from a medical stethoscope), and a warning indicator that sounded when the interior water level rose above six inches (15.2 centimetres), enhanced the diving bell’s safety and useability. During the three years it took to complete the bridge, only three workers suffered injuries significant enough to warrant mention in the local media, and none of these were fatal or life-threatening.
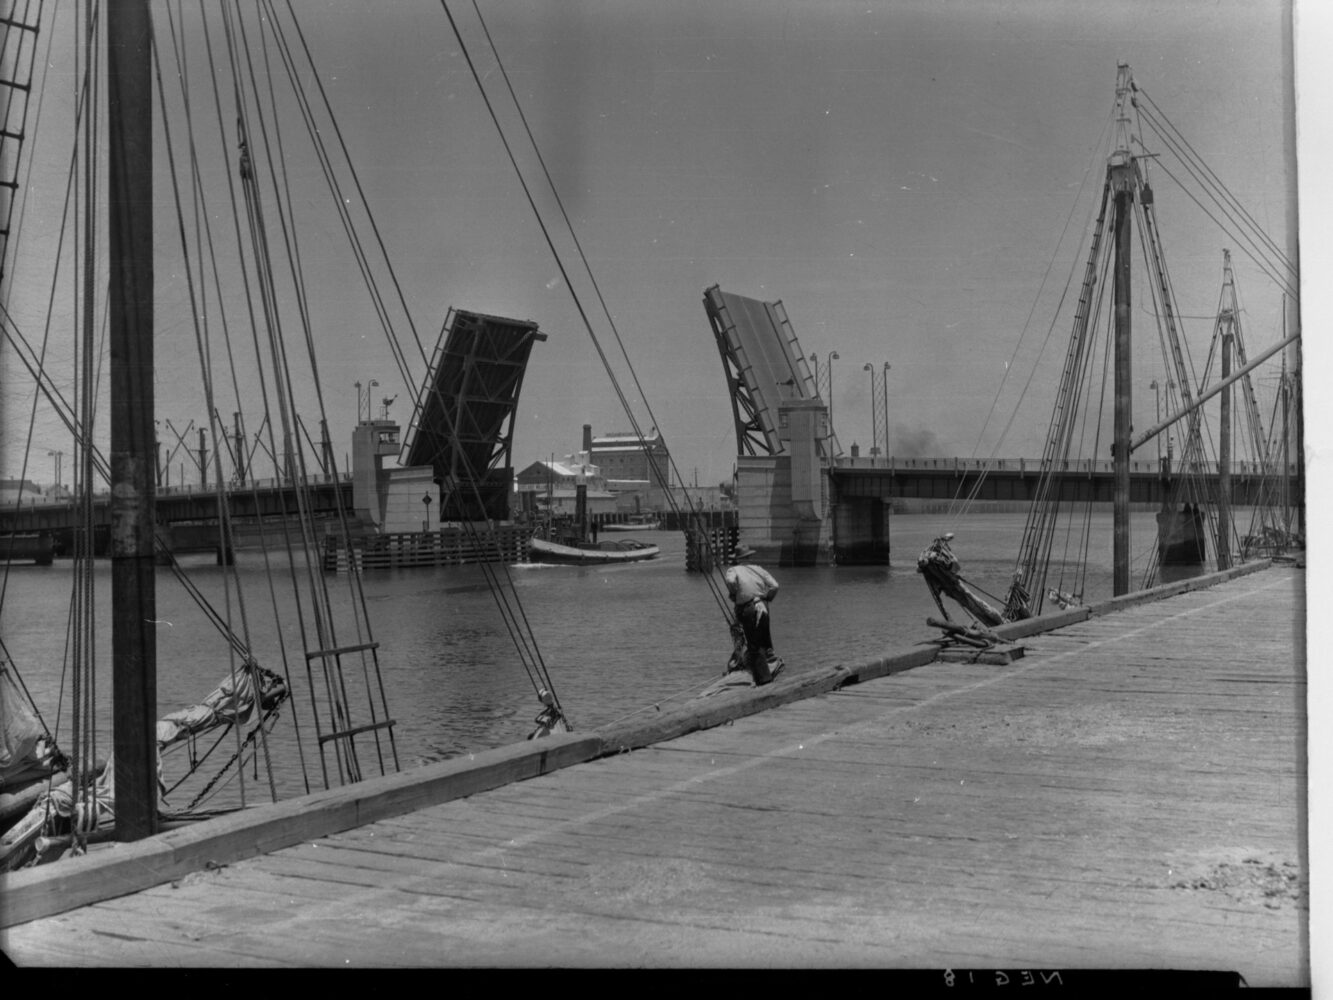
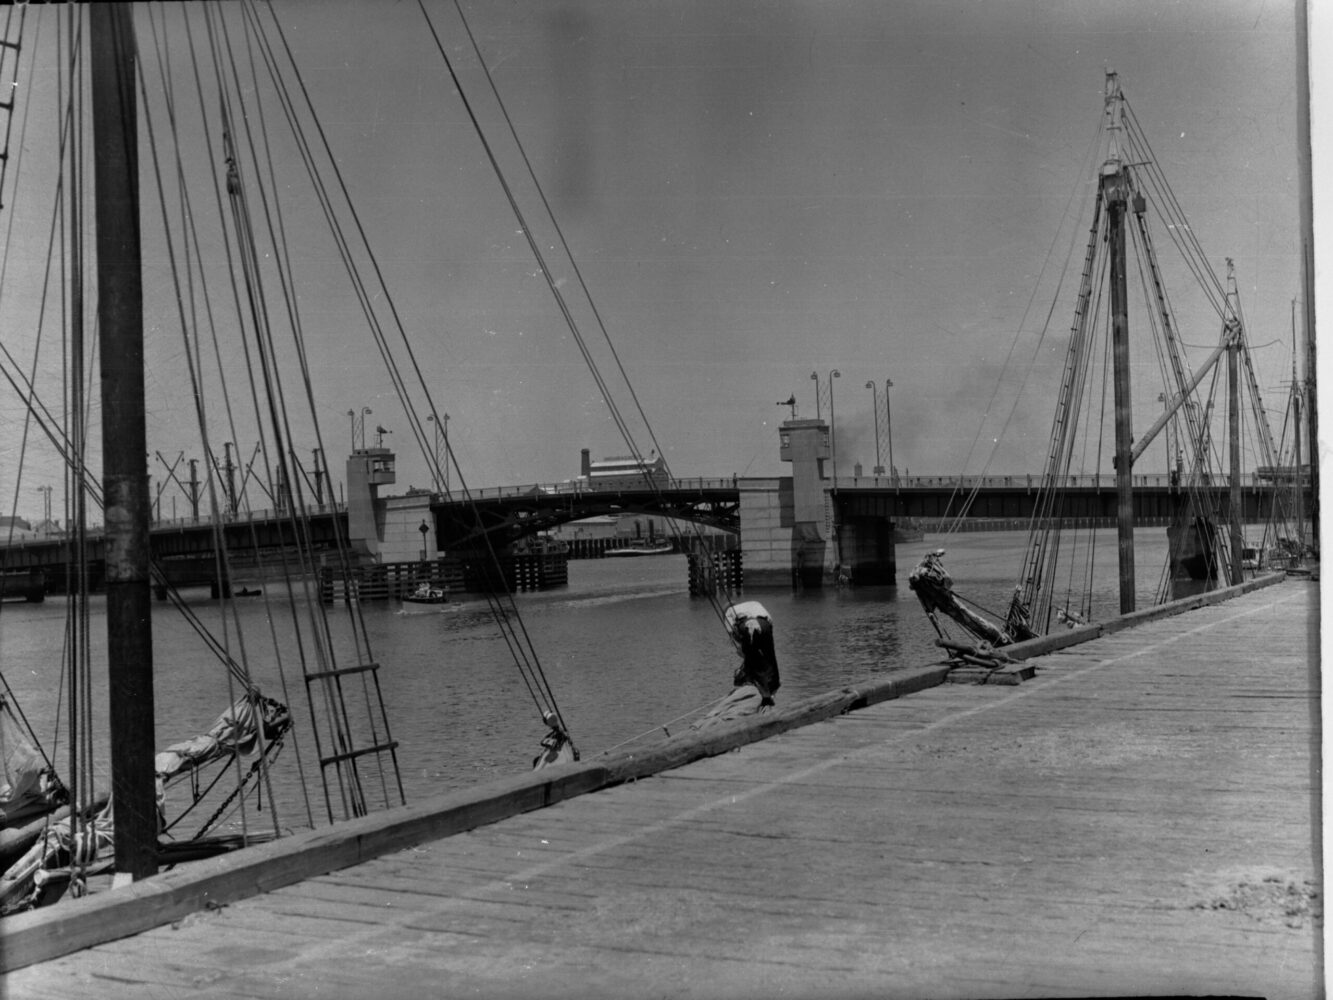
As completed, the Birkenhead Bridge measures 807 feet (246 metres) between abutments, and has a maximum width of 52 feet (15.8 metres). Its double-bascule design was the first erected in Australia. The central opening span is 182 feet (55.5 metres) long and powered by twin 40-horsepower electric engines. When opened, the bridge creates a gap 100 feet (30.5 metres) wide through which river traffic may pass. The four road traffic lanes originally had a combined width of 40 feet (12.2 metres) and were bracketed on each side by a single six-foot (1.8-metre) wide pedestrian footpath. Each roadbed and footpath was overlaid with wooden decking, which was then covered with a layer of bitumen. Two control towers—one located on each side of the span adjacent to the machinery pit—are available to operate the bascules. Under normal conditions, only one tower is used; the second is to be employed only in the event of an emergency. At the press of a switch, the bridge can be opened to its maximum extent in approximately one minute.
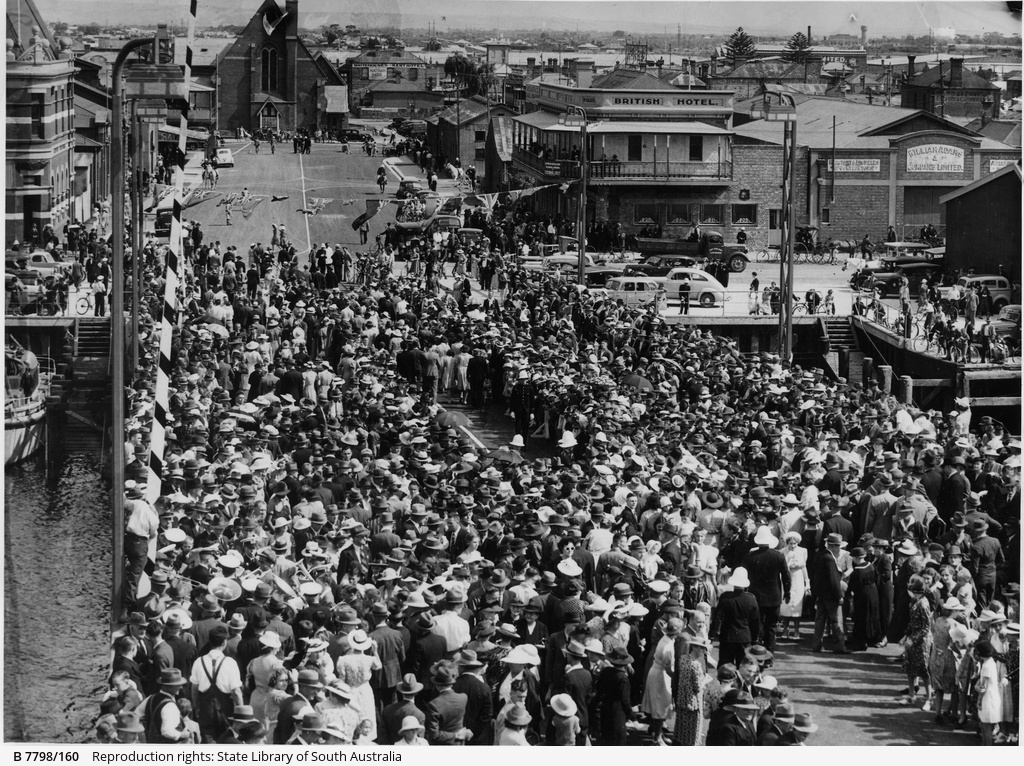
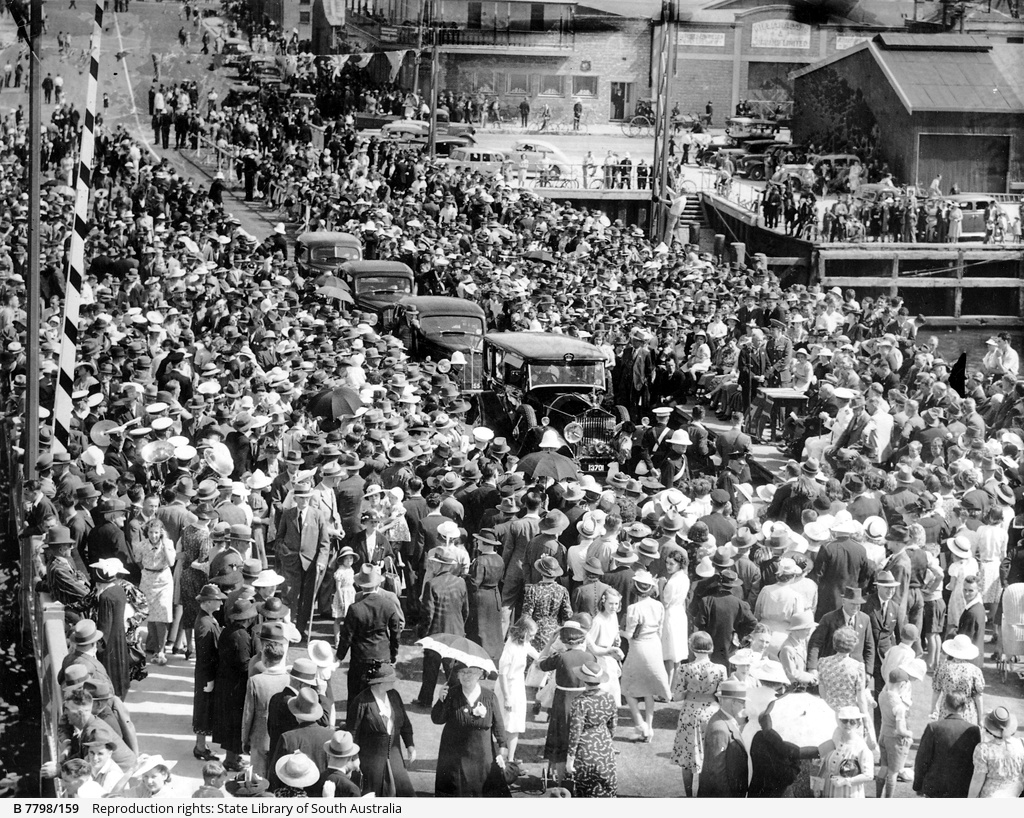
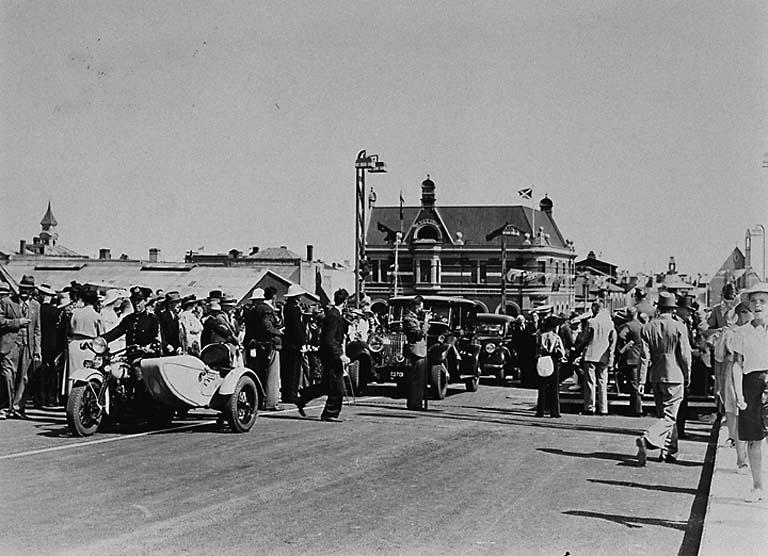
Governor Barclay-Harvey officially opened Birkenhead Bridge on 14 December 1940. Construction had continued apace despite the outbreak of the Second World War, and the span was only a few months behind schedule when completed. Following a ribbon-cutting ceremony that included South Australian Premier Thomas Playford and several other local and state officials, the Governor was accorded the honour of being the first person to drive a car across the Port River to Birkenhead.
Accidents and Incidents
Shortly after completion, Birkenhead Bridge was ‘modified’ as a consequence of wartime concerns. Australian Army demolition experts drilled a series of apertures beneath the southern bascule intended to hold explosive charges. These charges were to be detonated and the bridge destroyed in the event of an invasion which, thankfully, never eventuated.
Over the course of its history, the bridge has been the scene of a handful of serious accidents. The first of these occurred on 29 October 1944, when 11-year-old Pamela Inglis was caught on one of the bascules as it rose to allow a ship to pass. She was riding her bicycle across the bridge but stopped near the centre and dismounted to watch the approaching vessel. Despite warning signals and repeated urging from her friend (who had safely crossed to the other side of the span), Inglis remained on the bascule as it began to rise, lost her footing and slid 48 feet (14.6 metres) to its base, where she fell through a small aperture into the machinery pit 30 feet (9.1 metres) below. Unconscious and in critical condition when extricated by police an hour later, she remained in a coma for three weeks, but ultimately made a full recovery.
In the weeks prior to Pamela Inglis’ accident, two incidents involving automobiles occurred on the bridge, and called into question the effectiveness of its warning signals. The first involved a car still on the span when the bascules began to rise. It had already commenced crossing the bridge when the warning signal sounded, and made it safely to the Birkenhead side, but was prevented from exiting by the closed boom-gate. Despite the driver sounding the car’s horn and attempting to flag down the bridge operator, the bascules rose eight inches (0.20 metres) before they were stopped. The second incident, which occurred only a few days before Pamela Inglis was injured, followed an almost identical scenario. In the wake of these occurrences, a loud-speaker was installed on the southern control tower and used to warn drivers and pedestrians who ignored the bridge’s existing safety alarms and barriers.
Several minor automobile collisions have occurred on the Birkenhead Bridge, as have a handful of instances in which vessels struck the span while attempting to pass through it. In the most severe case, the skipper of the ketch Capella narrowly avoided injury when the bridge’s closing bascules snapped his vessel’s mainmast off and drove it through the roof of the wheelhouse. This incident resulted in the installation of a closed-circuit camera in an effort to improve the bridge operator’s view of the passage through the span and its approaches.
A severe automobile accident on the night of 22 August 1978 resulted in the only fatality in the bridge’s present history. Firefighters called to tackle a blaze on the northern approach were horrified to discover that its source was not a reported ‘petrol spill’, but rather a large fuel tanker truck that had rolled over and erupted into flames. Worse still, the truck crushed a car beneath it and trapped the driver, a male resident of Taperoo. Efforts to free the man were unsuccessful, and he died in the conflagration.
Recent Years
A steady decline in maritime activity within the Inner Port in recent years, coupled with construction of both the new Jervois Bridge and the Port River Expressway, has significantly diminished the amount of road and maritime traffic that utilises the Birkenhead Bridge. Nonetheless, it continues to function as an essential link between Port Adelaide and Lefevre Peninsula. In recent years, the span has undergone episodic repair and in early 2014 two of its lanes were converted for exclusive pedestrian and bicycle use.


Comments
17 responses to “Birkenhead Bridge”
Thank you for the info on the opening date of the Birkenhead Bridge
You’re welcome Bill, we hope to have more Port Adelaide content up in the future as we continue working with the SA Maritime Museum.
Amongst your historical records do you have the name of the person who laid the foundations for the Birkenhead Bridge? I believe it was my grandfather William Taylor, a deep sea diver by profession, who lived in Birkenhead. I have not been able to verify this information from any documented sources about the bridge or Port Adelaide. Bill (as he was known) was well known in the Port and Birkenhead and often did small diving jobs as favours and at times assisted the police with their investigations by recovering items from the river bank. If you are able to confirm this about the bridge my family will be grateful. Thank you.
HI David, I’m not sure about that one. I would suggest trying the Port Adelaide Enfield Local History Collection https://www.portenf.sa.gov.au/page.aspx?u=2357 who have a wealth of material on the Port. If they don’t have something in their collection I’m sure they’ll be able to point you in the right direction.
My grandfather saved a dogs life on the Birkenhead.bridge as the was running a cross as it was opening
What a fantastic bit of family history Simon!
Hi.
My Uncle Frank Schembri was a dispatch rider during the war and I believed he jumped his Motorbike over to the other side as the bridge was opening. He had a very important document to get to the Keswick Barracks. I’m not sure on much else of the story but you might be interested in it.
Cheers
Bob Schembri
Hi Bob,
Sounds like a fascinating story. If you click the ‘add to’ button at the top of this article you can share as much of the story as you like, including any pictures you want to upload. It will then appear as a linked page on this site.
Hi Bob, I’m writing a book on Australian Despatch Riders of WW II and came across the story written by your Uncle Frank “The Man Who Jumped Birkenhead Bridge”. I can forward it to you if you like? Do you know if there are any family photos of Frank in uniform with his motorcycle?
Regards, Rob
I used to walk over this bridge with my my mother pushing a pram on the way to and from Port Adelaide to Draper in the mid to late 1950’s.
I was always petrified that the bridge would open when were walking over it. They had the boom gates and the sirens but in my child mind I used to think that the man in the bridge control tower might not see us.
It must have been quite daunting as a small person Denise!
my family lived in a small house in witch they had six kids pre 1939
Times have certainly changed Robert
I am trying to find information about my great grandfathers bakery at Birkenhead during approx 1940’s. It was in Rann street I believe. His name was Frederick Adolphus Smith and lead a cook in the navy. He also drove the tug boat ‘Woonda’ at some stage. Judith
Hi Judith,
Since he was in the navy there will be records of Frederick in the Australian War Memorial https://www.awm.gov.au/ and the National Archives of Australia https://discoveringanzacs.naa.gov.au/browse/person/1657
You may be able to pinpoint the bakery name and date searching the directories of the time: https://guides.slsa.sa.gov.au/c.php?g=410329&p=2795763 and if you have those you can search for the bakery in the newspapers section of Trove: https://trove.nla.gov.au/newspaper/search?adv=y
I know the State Library of South Australia has an image of the Woonda in this collection – https://collections.slsa.sa.gov.au/resource/PRG+1642 There are also several items in the South Australian Maritime Museum collection related to the Woonda, but these are not yet online.
Hope these links are helpful.
Hi. Im trying to find more information about the Birkenhead Lutheran Hall being towed across the Birkenhead Bridge from its home on Levy Street to Cheltenham Parade. I believe this occurred around 1947. It even went around the Black Diamond corner under police escort (this is from Lutheran Archives)
Hi Kim,
You could try looking through old newspapers on Trove (https://trove.nla.gov.au/) or even the Port Adelaide Historical Society (https://portadelaide.org), they may be able to shed some more light on this interesting move!